Best Places to Metal Detect

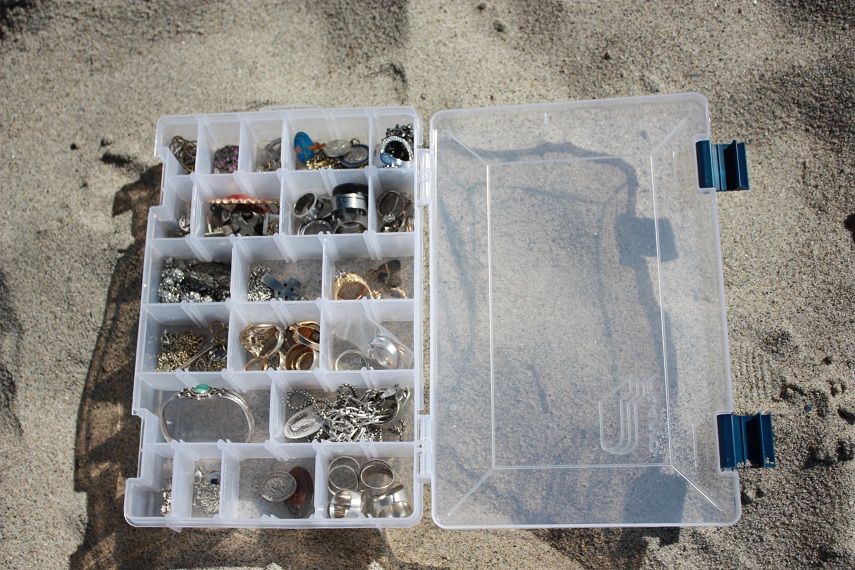
There is Treasure Out There But You Have to Know Where to Look! These Are The Best Places to Metal Detect!

If you have your metal detector and the necessary accessories but not sure of where to go, you have come to the right place! Below are what I consider the best places to metal detect based on my personal experience. Depending on what you are searching for should dictate where you hunt of course, but for the purposes of this page I am going to focus on both the older items as well as fresh drops as most of the good places to metal detect will have both. The places mentioned below should give you some ideas on where to metal detect but remember you have to search a potential location thoroughly as even the most heavily metal detected locations can still produce great metal detecting finds. The best place to metal detect is a location that you know well and have documented. Don’t forget to record your finds so you know what areas are producing more than others. Old coins, jewelry, or relics have a funny way of sticking together, that is if you find one, more will follow. Now lets get into what I consider the best places to metal detect!
 

General Tip on How to Find Good Places to Metal Detect:

Below I will get into specific places to metal detect but a more general piece of advice is to know your surroundings. A great way to find that out without actually moving is google maps. It is amazing all the different locations you can find with Google maps. If I am going somewhere new for the first time (a state or town I have never been to) I always Google map the area to look for the best places to metal detect in that area. There are also plenty of old maps online, just type in the area you are interested in and click Google images to find pictures of old maps. Also, check out historicmapworks.com. This website is great for researching old maps. One thing to keep in mind is if it was easy for you to find a location then it was easy for another metal detectorist. If you want to find locations that have never been hunted you have to think outside the box in terms of research. Asking relatives or friends that know the area well can produce hidden gems because those places may not be reflected on online. If you are out driving you can always do some recon by looking for signs of previous activity. Below I am going to break down where to metal detect based on your own experience level. I personally started with the locations below to get to know my metal detector and learn proper digging technique as these are crucial to finding anything while metal detecting.
 

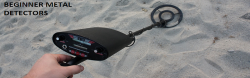
Best Places to Metal Dectect for the Beginner:

The reason these are the best places for a beginner metal detectorist is because they have a high threshold for testing things out and learning from your mistakes. When I first started digging targets, it took me forever and I left a huge holes in the ground. However, this was in a large sand portion of my local park and I could quickly push sand over the hole with ease. No harm done and no maintenance crew questioning my digging technique.
 
Your Own Backyard:
If you live in a home that has a backyard this is a great first place to start. For one, you can practice by making a test garden, or even look for lost items from previous owners. Remember, if the property is older than 1965 you have a chance to find some valuable US silver coins. Check by any walkways in the front or back of the house. Also, be sure to check for any previous buildings or structures like decks or patios.

Local Playground/Tot Lot:
The local playground, depending on how long it has been there can produce both new items as well as old. Good places to metal detect at the playground are around swing sets, slides, or anywhere parents play with their children. Also, keep an eye for where people set down their belongings as items may fall out when they pick them back up. Check the edges of any basketball courts as well. Digging targets should be straight forward if the ground is made up of sand or wood chips.

Relatives Old House or Property:
If you have any relatives that live in homes that have a long history on the property this can be a great location to find older items. Be sure to ask for permission of course but it shouldn’t be to difficult if you are related. Look for old foundations or ask if there were any existing buildings that are long since gone. Check around the front & back porch, sidewalk areas, and if there were places where they hung laundry. Also, while I have never found one, it was common to bury coin caches as there was a fear of banks. Look for trees or other landmarks that would be a good place to bury something. Also, anywhere that was visible from inside the house through a window so the person would always be able to check on that location.

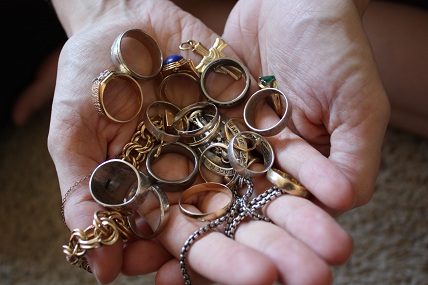
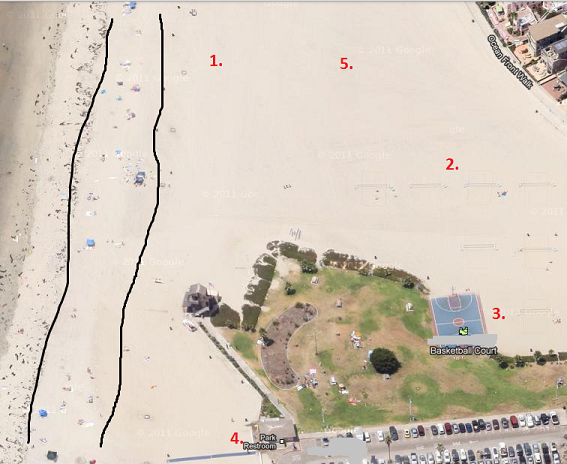
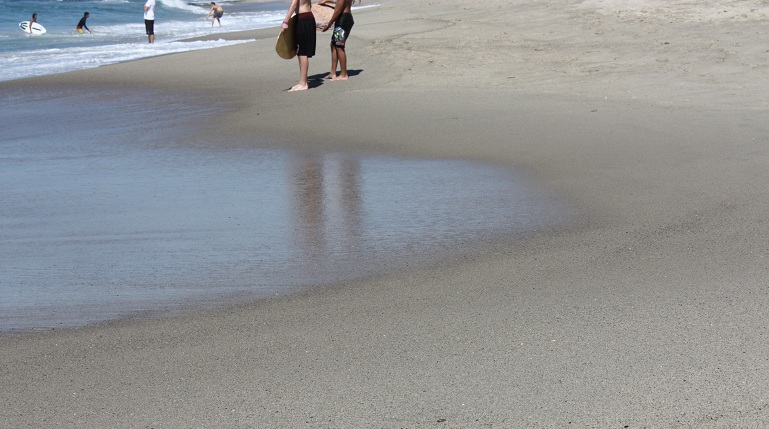
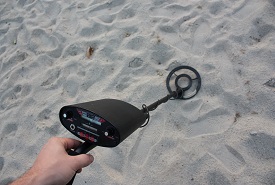
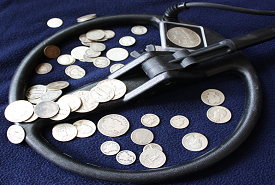
Dry Sand at Your Local Beach:
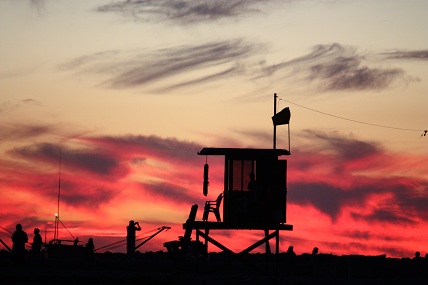
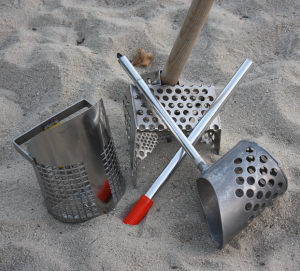
The dry sand of your favorite beach can be a real gold mine. Especially during the busy summer months, you will be surprised at all the different targets. Digging in the beach sand is simple and easy, especially with a beach metal detecting sand scoop. I cover beach detecting spots in depth on another webpage but you want to check around the towel line, volleyball courts, and by the lifeguard towers. If you are still a little self concious about other people watching you, think about going in the morning before everyone shows up or in the evening right after sunset but be mindful of beach curfews.
 

Best Places to Metal Detect for the Experienced Hunter:

If you have been metal detecting for a little while and have got the hang of all the bells and whistles of your detector its time to start thinking about new opportunities. The locations below are for the experienced metal detectorist because if you are digging incorrectly you will be called out! That is, if you are leaving holes in the local soccer field, be prepared to have an interesting conversation with the employees who maintain the grounds. You should now be hunting places where you can use your metal detecting experience to find items that are being passed over by others or they have not thought to detect that location.

Schools/Colleges:
Permission here is important. But once you have that its a great place to search. I have never personally hunted a college but when I was at college I ran into two guys who had just finshed hunting a large college campus (it was during summer on a Saturday, no classes). They showed me their finds for the day, loads of clad and a few pieces of jewelry. The key is to go when class is not in session and look for acitivty centers or large areas where students like to sit on the grass.

Activity Areas of the Park (Baseball, Soccer Fields, Football, etc.):
These can be at parks or colleges. Be sure to check not only the action spots (home plate, end zone, etc.) but be sure to check AROUND the field. The audience can leave behind plenty of goodies as well. Be aware that you need to be an excellent digger when it comes to these or have a good relationship with the groundskeepers because if you leave holes in any field you will be asked to leave. However, these can produce great jewelry, especially if they are for adult sports. Look for sports parks around large businesses as the employees like to go there at lunch or after work.

Construction/Sidewalk Tearouts:
Cities are regularly updating their infrastructure which means tearing up existing sidewalks. This is like opening up the past to you! It is likely no metal detector has had a chance to hunt the area. Keep an eye out when you are driving as these rarely get any mention in the media. If you decide to go during the day and there is a construction worker just politely ask if you can metal detect the site without interfering. Most of the time they don’t care are usually curious by what you find.

Wet Sand & Water of Beaches:
Whether it be at the local salt water beach or a popular fresh water lake, getting into the water can produce amazing finds. You will need a dedicated machine and sand scoop but if you concentrate on the high traffic areas you can find jewelry and coins. It’s hard work and you want to time when you go out with the tides. Rivers can also be productive if you find places where there is rafting or inner tubing. Look for where they enter and exit, or particular spots that have them getting in and out.

Abandoned Buildings/Ghost Towns:
You may heard stories of ghost towns being full of old relics and treasure. Problem is most have been hunted to death with not much left to find. The key is finding the ghost towns NOT well documented. If you can find the location on google maps everyone else has. You need to use other methods like talking to locals or driving around yourself. Be aware of what is private property so you do not trespass but finding territory that has not been hunted by a metal detectorist is a dream come true as the possibilities are endless.
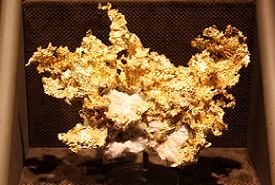
Nugget Shooting:
Nugget shooting is looking for gold in its raw form. This requires a dedicated metal detector designed to find the smallest amounts of gold. Check your local area but there certain areas where you can go searching for nuggets.

Here is a list of potential sites to give you an idea of all the places you could find great items:

Old homesteads with obtained permission
Fairgrounds/Circus Grounds
Winter Ski Locations (especially the bottom of the hill)
Summer Camps
Church Yards
Construction Sites
Grass Strip between Sidewalk and Street
Farm Fields that were farmed many years ago
Near Telephone Booths
Around Parking Meters
Rural Mail Boxes
Bus/road Pit Stops
Forgotten Post offices
Local Swimming holes
Old Railroad stations
Abandoned Out Houses
Old Drive In Theaters
Postholes (Old fence posts)
Old Trees that provided shade

Metal Detecting Tips – Hunting the Beach

Interested in beach metal detecting? Or have you been hunting the beach with little to show for it?

Beach metal detecting findsYou have come to the right place! Here are some beach metal detecting tips I have uncovered in my time metal detecting both the dry sand and the wet/water. The picture to the right should get you excited about all the beach metal detecting finds that are possible! However, keep in mind, it is not all glitter and gold because metal detecting on the beach will produce a wide variety of junk as well. The beach metal detecting tips below should help you concentrate on the areas that are most likely to produce the goodies!


Using the Right Metal Detector For the Beach:

Keep in mind, for dry sand metal detecting, all the beginner metal detectors listed here will perform well and if you want more bells and whistles any of the relic machines discussed here will comb the dry sand with ease and provide great discrimination which is a must on trashy beaches. If the wet sand & water appeals to you, check out this page on the most popular underwater metal detectors.

 
Beach WavesThe first beach metal detecting tip is learning how to read the beach. I will get into details below but this is about developing an understanding of the beach you regularly hunt. Just like with relic hunting, research pays off. You have to think about all the variables. I am a creature of habit, I hunt the same two beaches regularly. Why? Because I know them like the back of my hand. I know when the sand levels are low/high. I know where people swim most of the time. I know when the clean up crew comes and I even know when most of the detectorists are there! Knowing this gives me an advantage because I am able to adjust how I detect to maximize my finds.
 

What Are the Beach Metal Detecting Dry Sand Hotspots?

I know the feeling when you get to the beach…where the heck do I start this place is huge. Yes it can be intimidating but you have to focus. You need to ask yourself these questions, have beach-goers been in the water lately or have they been just relaxing and catching some rays? Are there certain entry/exit points that many beach-goers go over? Are there “activity centers” like volleyball courts, horseshoes, or places where other sports are played? You need to focus on maximum potential for the beach. Don’t have answers to these questions? This is one of the most important beach metal detecting secrets, do research! Grab a towel and sunscreen and head for the beach when most people are there. See what they are doing. For example, in Southern California from January to April the sun is shining (weather permitting), it’s beautiful out but why are there so few in the water compared to laying out on the beach? Because the water is very cold! Before you North Eastern people call me a wuss, it’s all relative, we are warm blooded down here! Yes there will be some brave souls in the water but it will pale in comparison to those relaxing and enjoying the sun. Therefore, I focus on the dry sand hotspots like the “towel line”, volleyball courts, and fire pits discussed below. Now when the water gets warmer and the summer kicks in, I shift my focus to the wet sand.

 
beach Dry Sand Hotspots:
1. Towel line is the first place I check when metal detecting on the beach. This is where people place their towels and belongings and put on sunscreen. Sunscreen and/or sweat cause greasy fingers, increasing the likelihood of a ring falling off. I have found sunglasses, coin spills, rings, and necklaces in this area. Be prepared to dig plenty of trash but you will be rewarded. Those two black lines show the current “towel line” on this beach. Notice how they are all roughly the same distance from the wet sand. If you want to focus on this section, pick the highest concentration of people as with some beaches the towel line can extend pretty far. If you have not been to the beach before and you are unsure of where the towel line is look for sand build up before the wet sand, many people perch on these mounds. Also, you will get to know the different impressions in the sand that indicate different activities. Seeing where a towel was is pretty easy to determine, as well as foot traffic. Look for these signs and swing your detector to see if they left anything behind!

2 & 3. Activity centers such as the volleyball courts, horseshoes, or see where people like to play soccer, football, you name it. Also check beside them, this is where they place their belongings and spectators watch. Sports can rip necklaces and bracelets from their wearer. As you can see by the picture there are plenty of volleyball courts but there is also a paved basketball court. Most of the spectators will be watching in the grass and in the sand. Check these areas as well.

4. Entry/exit points are where people may stumble to grab last minute items or need to adjust just how they are holding things. For example at this beach, the restroom serves as the entrance/exit as well. Scan along the wall/walkway by that location as that is where people set their things when they are rinsing off. Also, anytime someone is jumping, in this case over the cement wall, the chances of something flying out of their pocket increases. Keep this in mind when you are scanning along the low walls that line the beach.

5. Wide open space is going to be the last place you should check. While it may produce a great target the odds are slim. As you can see by this picture the area is large and will take a long time to cover. If you have a large amount of time to search, you can give it a try. If I have hunted out all the normal hotspots I will usually hunt this quickly and randomly just to see if I get a target or two. If I am finding targets, I slow down and swing carefully.
 

Metal Detector Finds Pouch

Beach Metal Detecting Finds PouchWith all the goodies found at your favorite metal detecting beach you are going to need a place to put them so you can continue on your hunt. Metal detecting finds pouches are worn on the waist (most come with a belt) and are designed to hold not only trash items but your keepers in different compartments. Another important feature are “drain holes” so you can quickly rinse out all the sand that is stuck to your beach metal detecting finds, making clean up much easier.

 
Unique landmarks can produce finds. When I say landmarks I mean anything that is unique to that beach where people would throw their stuff for the day. Examples would be under trees, by piers, or even sand dunes. People want to be able to easily remember where they put their belongings. Throwing their towel and backpack by the pier is easy to remember and they will be able to locate where their stuff is if they go in the water.

 
Life guard towers Lifeguard Tower Sunsetcan be great as well. Beach-goers like to sit and relax on these when the lifeguards are off duty. You can find dropped goodies in the sand nearby. Also, people tend to congregate near life guard towers during the day and are more likely to go in the water in front of them for obvious reasons. Keep this in mind when you are doing your research on where people are on the beach. Remember life guard towers are usually made of aluminum or other metal. One idea is to wait and see if they move them after the summer is over, usually you can find a good assortment of coins and other items where they sat for the season.

 
Fire pits Firepit2formattedcan produce great finds but you will also dig nails, aluminum blobs, and food wrappers. You may need to turn up the discrimination. I recommend that you have some experience with your beach metal detector before you try metal detecting around fire pits as it can get frustrating digging all that trash. You should consider getting a sniper coil. These are small coils designed for trashy areas (parks, picnic areas, fire pits, etc). They also allow you to get closer to larger metal objects while still being able to hear the small targets close by. This is important for fire pits because some are concrete with rebar housing, causing most detectors to have problems when swinging your detector near them.

 
Secret/Private locations can be a gold mine.caveThis one may seem strange but on many beaches you can walk in either direction and get to the less crowded parts of the beach where expensive homes line the sand. There can also be little nooks and caves that are scattered. This is make out central! Don’t go cruising around there at night or you may get a surprise. Also, people like to place their belongings in here to keep them protected from the elements. Please exercise caution when entering sea caves, some can be unstable. You can usually tell if there is people activity based on the prints left in the sand. If you see a lot of foot traffic, swing over the area, you may get lucky! I usually hit these during the day or in the early morning and these places have rewarded me with watches, jewelry, and coin spills.

 
Final Dry Sand Beach Metal Detecting Tip: Timing!
Hunting the dry sand of a popular beach is extremely competitive and can be a vast stretch of land. The dry sand hotspots above should help you focus on WHERE to hunt but I also wanted to mention another of my beach metal detecting secrets: WHEN you should hunt the dry sand. If you are interested in metal detecting the dry sand, timing is important. My advice is to head down just before sun down on a Saturday or Sunday night. Why? Because the regulars like to head out the next morning but you will beat them to it! Now keep in mind, some beaches have curfews and if you are worried about people at night, try hunting from 6 p.m. to about 10 p.m. That way, its not terribly late and there will be some people around but there will be plenty of sand to hunt.


Wet Sand/Water Beach Metal Detecting Tips:

Many books have been written on where to hunt the wet sand/water. Why? Because its complicated! There are so many factors at play when searching the wet sand. Tidal movements, storms, shape of the beach, you name it. It comes down to one thing, sand movement. Below are some basics but if you really want to get in depth information check out this book which details wet sand hunting, Gold Beneath the Waves: Treasure Hunting the Surf and Sand.

How to find the ideal beach conditions: Knowing when to search the low tide/water is about researching the tides and the current wave conditions. I like to use www.magicseaweed.com because it gives both tide and wave details once you select your beach. Also, check to see if the beach you are metal detecting has a beach camera. These beach cameras are invaluable as they show how crowded the beach is, if there is a storm, current sand conditions, you name it.

Metal Detecting Low Tide:
I like to get to the beach in the morning around an hour before low tide. Some like to get there earlier but I have a day job and waking up around 5 a.m. is hard enough.  I prefer to work the visible wet sand, starting where most of the water activity takes place.  Depending on how much sand is on the beach you want to focus on flat portions.  If there is a slope and then it levels out, work that area.  Items can be pushed onto the slope but for the most part they will settle in the leveled out area. Look for jetties or the ends of beaches as sand can accumulate here, as well as targets.

Look and feel the sand: What is the consistancy, when you press your foot in does it sink in a little or is there resistance. This is important because this will determine how deep the targets are and how much light sand is covering them up. You want to feel hard packed sand. If you see shells or rocks, this is a good sign. It shows that there is potential for metallic targets as well. Also, some beaches have overburden sand and beneath a rock/shell/clay layer of sand. The closer you are to this layer the better, as most objects get stuck in this mixture as it is very dense.

The first hotspot to look for are “troughs”.  These are areas close to water line that have created a long trench running parallel along the beach, they are usually in the water or can be visible during a negative tide.  Items will settle in the trough, I usually find the heavier items here, like watches, old phones, etc.

Another hotspot are “scallops“.Scallop1formattedThese are similar to troughs but instead of being in the water, they form during the transition between high tide and low tide.  They are different in that they run perpendicular to the beach. It will look like the beach has humps as there will be high and low sections. The low sections act to funnel wave action whereas the higher banks have little sand movement. Items will settle in certain locations typically on the banks or if there is a slope, when the slope starts to decrease. Remember the wet area is lower, so you may be able to find deeper, older items in that area depending on how deep the scallop is.

One thing to keep in mind is that as you search the wet sand of the beach you may find a concentration of items.  This is called a “pocket“.  You want to really go slow in this area because if you are finding concentrated items like crusty coins or heavier items, the likelihood of old jewelry in going to be increased.

Beach Metal Detecting: Water Hunting
This is the final step in beach metal detecting because it is by far the most difficult. There are guys out there who dive and go past their necks when metal detecting which I do not do, nor do I have any experience. For the purposes of water hunting I am talking about around knee to chest high. Any higher and you need to worry about weight belts and other gear. Remember you may be able to detect out in the deep water but good luck digging up a target.

Finding Targets: Similar to wet sand hunting, looking for troughs is key. Also, look for shells or any debris that is on the bottom. Those items collect in certain areas underwater, usually just past the wave break. Work slowly because the increased friction on the coil and shaft from the water can tire you out quickly and puts additional strain on the shaft. Keep your eye on waves as a surprise one can ruin your day. Also, shuffle your feet so you don’t get a nasty surprise from a stingray.

Digging Targets: Now the fun begins. Extracting the target without it being washed away! Once you have a good target place the coil over the target on the ground and hold it there as best you can. Get your feet in a solid spot so you have a good sturdy position. Place your beach scoop right below the coil. Wait for a break in the wave activity, preferably right after one has past you, then start digging, hopefully you will get it in the first scoop. Be especially careful for waves and be sure you take decent sized scoops as there is a chance the target can get swept away from the waves.

If you are a serious water/wet sand hunter than the tides will be a primary guide for when you hunt. I usually check online but when I am at the beach I like to know where the tide is at. I got my tide watch as a gift. I put mine on when I plan to go hunting so I know how much time I have left with a low tide. The Casio Tide Watch I have is inexpensive and has held up pretty well. You would be surprised how fast the time flies when you are metal detecting!
 

Beach Metal Detecting Scoops:

Beach Metal Detecting Scoops A durable, metal detecting sand scoop is probably the second most important item to have right behind the metal detector itself. Why? How else are you going to get the targets in the sand or even the water. Metal detecting sand scoops come in different materials and different sizes depending on your budget. Some are great for the dry sands of the beach while others are heavier but designed to cut through the thickest wet sand. Have a look at my page dedicated to metal detecting sand scoops.


General Beach Metal Detector Tip: How to Keep Track of Your Finds!

Knowing the details of where/when you found something memorable is a great tool for finding the same items in the future. What I mean is, you need to keep a “metal detecting finds log”. I use Microsoft Excel, but you can use a pad and paper. I usually start with the date, the name of the beach and go on from there. Here is an example:

05.13.2013 Newport Beach. Night time, Low Tide. Sand Level High. Found few targets in the dry sand but many in the wet sand near the pier. Found a gold ring at the high tide line.

beach metal detecting findsAs you can see, this doesn’t have to be super detailed but provides important factors and how much I found that day. You can even log how much change you found etc. I then like to compile all the hunts for the year and see where/when I found the most items. Did I find more at night or in the morning? Dry sand versus wet sand? etc. Having this information, you can fine tune where you hunt and at what time to maximize your finds.

The finds log is great for keeping track of the beach conditions but where should you keep the actual items you find? I use these Plano stowaway containers with adjustable dividers. They are under $5 bucks and simple to set up because you can move the dividers with ease. For example, in the picture, these are my jewelry finds seperated by type and what they are made out of.

Metal Detecting Tips – The Basics

Metal Detecting Tips for Beginners:

If you are thinking about taking up the metal detecting hobby yourself, now is the perfect time and hopefully by reading through this website you will find all the information you need. Below is what I consider basic knowledge that every metal detectorist should know. From learning how to metal detect, understanding the known laws, and finding the best places to metal detect, the information below should give you a good overview.
 

Metal Detecting Tips: Learn How to Metal Detect

Metal detecting is pretty straight forward and I am a firm believer in practice makes perfect. There are so many places to try it out but the key to metal detecting is knowing the location and knowing your detector. While this sounds obvious it is extremely important because with even a beginner metal detector, understanding the proper settings, technology, and capabilities of your detector are paramount. If you own any of the metal detectors that I have highlighted on this website, you will find instructional videos and information regarding each detector. So how else can you learn how to metal detect?  Read the manual, browse forums, check out YouTube, and most importantly, get out there and try it yourself!   You can only get so much information from reading, you have to get out there and get comfortable with your detector. The video here is a great tutorial on metal detecting as this famous metal detectorist known as “ChicagoRon” gives a great metal detecting tips for beginners as well as an overview of the metal detecting hobby.
 

Metal Detecting Tips: Choosing your First Metal Detector

My first metal detector was a Bounty Hunter Tracker IV that I got for Christmas. I glanced through the manual and off I went to the nearest park for some treasure hunting. I was frustrated in the beginning but with metal detecting, perseverance is important. It took me months to figure out all the settings and I did lots of research on all the best locations to metal detect. I have compiled that information in this website so hopefully you have a good foundation for treasure hunting. Finally I settled on beach metal detecting and never looked back. Finding the type of metal detecting you enjoy, whether it be beach hunting, searching for relics, or looking for gold in its pure form, it is something that you will figure out once you have had your beginner machine for awhile. If you are interested in doing further research on your first metal detector have a look at this page detailing the best beginner metal detectors.
 

Metal Detecting Tips: Learn How to Properly Swing Your Metal Detector

The way you swing your metal detector is just as important as choosing the right settings. The popular metal detecting saying “low and slow” is about keeping the metal detector coil as as close to the ground without touching it and you want to swing the metal detector slow enough to allow it to process what is beneath it. For example, if you swing to fast, the metal detector will not pick up smaller targets because it did not have enough time to pick up the disturbance in the ground, thus no target will be heard. Additionally, if you swing your detector coil to far off the ground that is depth you are losing if it were closer.
 

Metal Detecting Tips: Learn How to Dig

This might sound vague but this is an important metal detecting tip because digging up a target without leaving any trace of you disturbing the ground is crucial, especially if you want to return to that spot! I have seen beginner detectorists with shovels at the beach and even at the park, don’t be that guy! Use the right digging tools for the job and cover your holes appropriately. Check out this video, it shows you how to properly dig what is known as a “plug”. Digging a plug involves cutting only a portion of the grass so as not to totally destroy the roots beneath and then firmly applying the loose grass back into the dug hole. This helps return the area to it’s natural state much quicker than leaving a big crater. Personally, I use a scoop on the beaches and a Lesche digger and pro-pointer when relic hunting. Using the right tools for the job is essential if you want to improve your efficiency when digging. The longer it takes to acquire targets the less area your will be able to swing your coil over.
 

Metal Detecting Tips: Bring the Right Equipment

Similar to learning how to dig, bringing the right equipment is everything. Your gear should help you stay out longer, dig better, and allow you to enjoy yourself when treasure hunting. For example, I have forgot my beach scoop on more than one occasion when I hastily grab my gear for a beach hunt. I usually keep a small shovel in my car so that is what I had with me at the beach. It was terrible, my ability to get targets went from seconds to minutes! Metal detecting in an of itself is not particularly physical, it’s the digging that can be rough on the body. Repeatedly bending over can be rough on the knees and back. These pants, knee pads, and gloves are great for metal detecting. Also, if you really want to speed up the dig time, grab a Pin pointer.

Metal Detecting Tips: Know Local Metal Detecting Laws and Regulations

I will start by saying I am not a lawyer but I think I have a decent grasp on the laws governing metal detecting. Now it is mostly going to depend on your location but in general private property is going to require permission, written permission being best. This is because if you are metal detecting on private property without permission it is considered trespassing. If you have any family members or friends with property, kindly ask if you can metal detect there. Also, state and national parks are off limits and usually the rangers will write you a ticket with a fine and confiscate your metal detector. Public property is hit or miss and there is a lot of grey area. Parks, beaches, schools, churches are going to be dependent on local laws and the people who work there. I have been asked to leave a local park and I agreed, this was by a maintenance crew, not the police. Could I have argued with the guy regarding his authority, sure, but it is worth it? No. There are plenty of places out there.
 

Metal Detecting Tips: Do Research on Possible Locations

Location, location, location.  The best places to metal detect are all about finding that spot that no one else has detected or one that is continually replenished. Yes you can get lucky and find targets with little research but it can pay off big if you look into the history of the area.  Here are some great starting locations:
 
High activity areas are going to be providing a continious supply of metal detecting finds. These areas includes, parks, schools, fairgrounds, sport fields, etc. It is important to think where items can be lost. With my first metal detector I hunted a nearby park, concentrating on where people relaxed for a picnic, the baseball outfield, and the bleachers (dirt underneath) where spectactors watched. You will be surprised by the amount of coins lost when people are moving around, not to mention possible jewelry and other items. It is a good idea to have a couple places in mind and rotate so you give the locations time to replenish the goodies.
 
Old ground is where you look for relics and silver coins but do your research and look for existing sites.  History is the key.  Is the local park by your house old?  Do you, your family members, or anyone you know have old property?  If so, these can be great hunting locations (should be easy to get permission).  If not, you can perform the research yourself with Google by looking for old maps, there are plenty of images online.  Please be aware of local laws and be respectful of private property but if you decide to look in the woods search for anything out of place such as depressed ground.  That ground could have been a cellar, a well, or the foundation of an old homestead, also look for areas near a water source. This might be a stinky proposition but old outhouses can be a great hunting spot as well. Be aware of what you are finding, are the nails or construction debris new or old?  Use your detector to help verify the age of the location.  If you would like to learn about relic hunting and other possible locations, click here. Check out this video, I LOVE it because it tells you so many great relic hunting locations and possibilities!
 
beach The beach can be a treasure trove of great items. From old coins to jewelry, the beach will regularly give up the goodies. That is because it is continually refreshed by visitors and mother nature. But, there is a caveat, it is also regularly hunted. You have to think outside the box when hunting popular beaches. Try to go after the crowds or when the weather is in your favor such as after a large storm or there is a low tide. Start with the dry sand where people place there items, often called the “towel line”. Other good spots are volleyball courts, entrances/exits to the beach, and fire pits (discriminate out the iron nails). If you want to know more, check out the best beach metal detecting tips here!
 

Metal Detecting Tips: Have Reasonable Expectations

You are going to find targets, lots of them. Don’t expect that every target will be long lost treasure.  Patience and positive thinking are important if you want this to be a rewarding hobby.  Personally, I like to get pumped up before metal detecting hunts by looking at my old finds or going on YouTube and seeing what others have found. I made a webpage for some of the best metal detecting finds on YouTube, if it doesn’t get you in the mood for treasure hunting I don’t know what will. Another thing I like to do is envision the old site, the history of what may have happened.  Every time I find something and I don’t know what it is, I run to my computer and Google it to see what I have. Having a positive attitude will help you appreciate every new find!  Don’t view metal detecting as a chore.  Appreciate being outside.  I love beach metal detecting and waking up at 5 a.m. can be rough but looking at the morning sunrise is one of the joys of treasure hunting.

You will dig trash, lots of it. It’s an unfortunate part of metal detecting. Why not clean up the environment at the same time is the way I view it. I carry a finds pouch for just that reason. One section is for trash and the other for coins, etc. It’s unbelievable the amount of trash people leave at the beautiful beaches in Southern California. I used to discriminate out trash. Little did I know I was discriminating out good targets! I can’t tell you how many gold rings have sounded iffy. Remember a gold ring reads as a pull tab on most detectors.
 

Metal Detecting Tips: Rescan Every Hole

You would be surprised how many targets share the same location.  I routinely find “coin spills” on the beach consisting of many coins.  Also, tidal action can produce “pockets” which are concentrations of items, sometimes one on top of the other.  Some detectorists will even search existing holes of others, often finding targets that were left behind.
 

Metal Detecting Tips: Have a Testing Location

Grab some different coins and possibly some jewelry and bring it to a spot where you can test out your metal detector by burying the items at various depths. Check out this video describing what is often called a “test garden”. I prefer the local park’s playground sand but you can just as well build one yourself. I regularly go to a local volleyball court at a park right by my house to test out various targets. Be careful with jewelry if you decide to bring any for testing, something to do is tie a piece of floss or fishing line to the jewelry so you know where it is when you bury it for testing. Play with the controls, paying attention to ground balance, discrimination, and sensitivity. Each of these plays a huge role in what your metal detector will find beneath the ground.
 

Metal Detecting Tips: Taking Care of Your Metal Detector

My Minelab Excalibur II is like a part of the family!  I use lubricants to keep the wires nice, I use a brush to get sand out of the joints, and I always clean it with fresh water after a long hunt, it goes in the shower with me sometimes!  Embarrassing I know, but I care about maintenance of such an expensive machine.  You should too!  Your detector will function flawlessly and last longer if you treat it with care.
 

Metal Detecting Tips: Metal Detecting Safety

I wanted to end with an important topic. Being outdoors has it’s dangers and metal detecting is no exception. Critters, poison oak, and unsavory people can be a problem (mostly just at night). Just exercise caution if you are alone in the woods or on the beaches at night. I always carry a backpack with water, snacks, and personal protection. The type of personal protection you should carry varies wildly by location, for instance at the beaches my large stainless steel beach scoop is intimidating enough. If you are just starting out, go with a buddy or stick with the familiar locations until you are comfortable. Go out in the day, the morning is always a great time. Also, in the evening before sunset. I have never had a problem with people, they are usually just curious but you may get some questions regarding your detector or your finds. Never show your finds at the location where you found them! If a person claims they lost that, what do you do? Now if someone comes to you saying they lost something, ask them what it looks like and where they lost it BEFORE you show anything. I am all about returning lost items but I don’t want to be tricked. I get asked regularly “find anything good?” to which I reply “nope just trash and some loose change”. As for your detector if someone asks “how much was that thing?” I reply “this old thing, about $100 bucks.” You don’t want to garner to much attention. Don’t get me wrong, I am always friendly and willing to tell stories but use your judgment.